Workflows
Table of contents
Install Workflows
NeuroWrap offers users the ability to install pre-configured workflows. This functionality enables users to conveniently integrate pre-designed workflows into their projects.
To install a workflow, follow these steps:
-
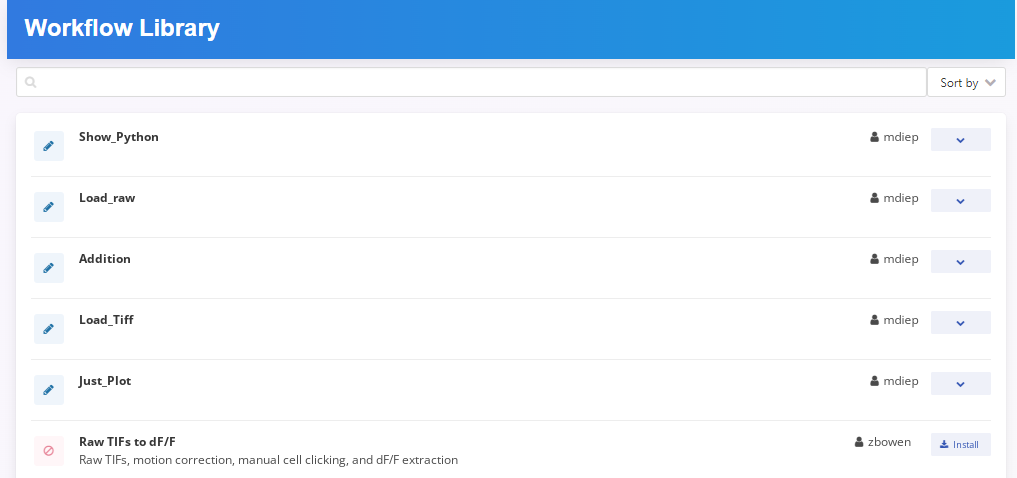
Access the workflow library by clicking on the “View” tab located under the “Workflows” section in the navigation bar.
-
In the Workflow Library, click the install button on right side of the module name.
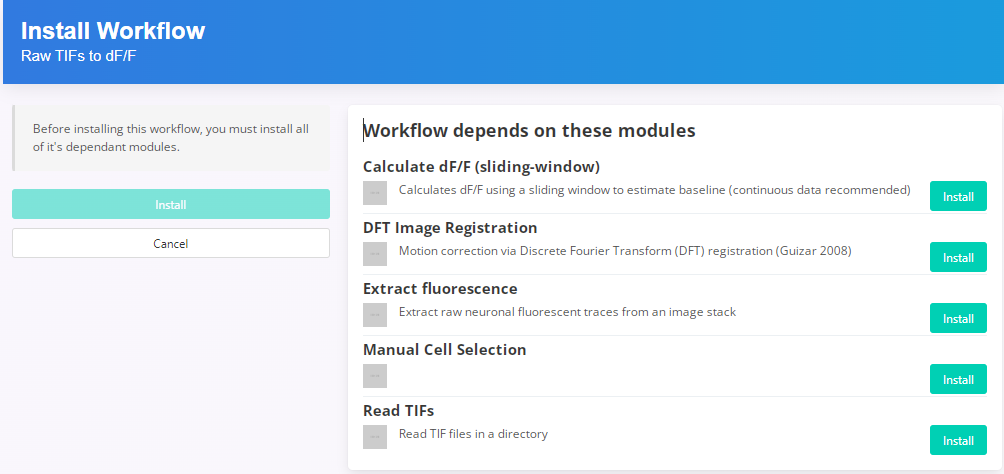
The workflow installer will verify if you have the required modules installed and will prompt you to install any missing modules (as indicated in the provided image). To install the missing modules, simply click on the “install” button next to each module. Once the installation is complete, press the “install” button located on the left side of the page.
Once a workflow is set up, it can be edited at any time by going to the “View Workflows” page and clicking the Edit button (pencil icon) on the left of the workflow name.
Create Workflows
You can create a custom workflow from scratch, download existing workflows from other users, or register workflows previous saved on your computer.
To create a custom workflow, click on the Create Workflows from the left menu pane. Then:
- Name your workflow and optionally give it a description (recommended)
- Click Add (‘+’ button) to start adding modules to your workflow. They will execute in the order they are listed in your workflow.
There are four different input types to choose from for each input when configuring a module in a workflow:
- Manual (default): Manual inputs let you manually enter a value into a field when creating or editing a workflow. Manual inputs support all data types except matrix.
- Runtime: Runtime inputs are just like manual inputs, but instead of entering a value while creating or editing a workflow, the value is entered in the Run Workflows tab. Runtime inputs allow you to choose different input values every time you run a workflow, without editing the workflow. This is useful for quickly running the same analysis on many different datasets.
- Pipe: The pipe input type enables passing data between modules by allowing you to choose an output of a prior module in the workflow as the input value. The available/possible inputs are listed in a drop down menu. Pipe inputs allow custom workflows to be set up quickly and efficiently while also acting as a guide for data flow between modules.
- HDF5: HDF5 inputs let you choose an hdf5 file and then choose a value from that file as the input value. This input type should be most useful for testing modules and in some special cases.
Register Workflows
If you have a workflow config file, you also have the ability to register older workflows. Here’s how you can do it:
-
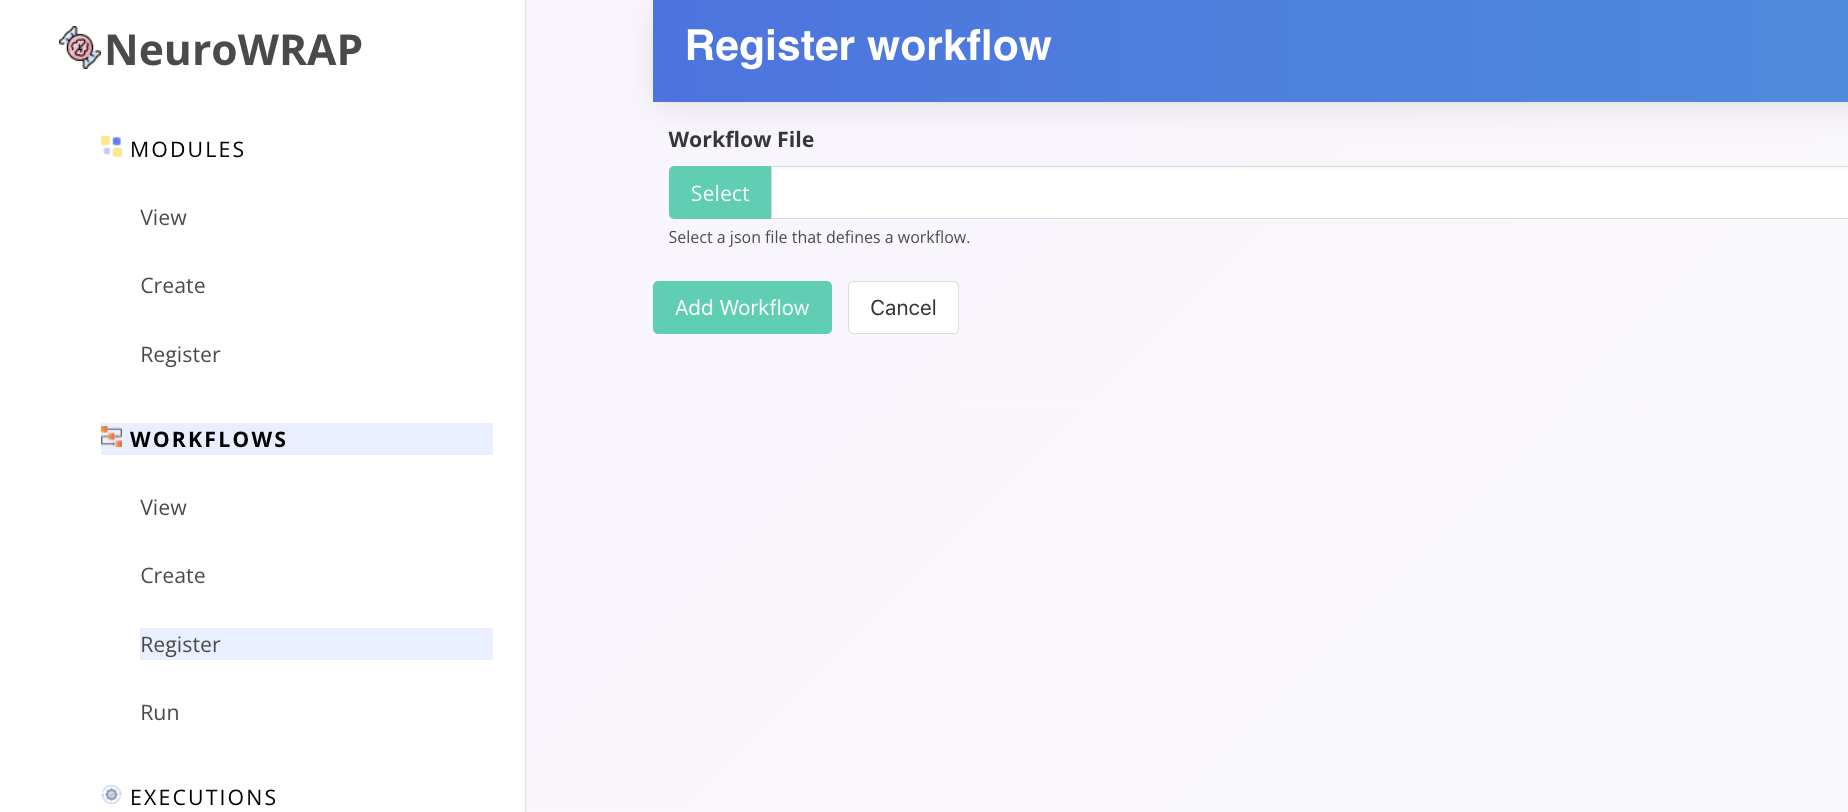
Click on the “Register” tab, which will direct you to the registration screen.
-
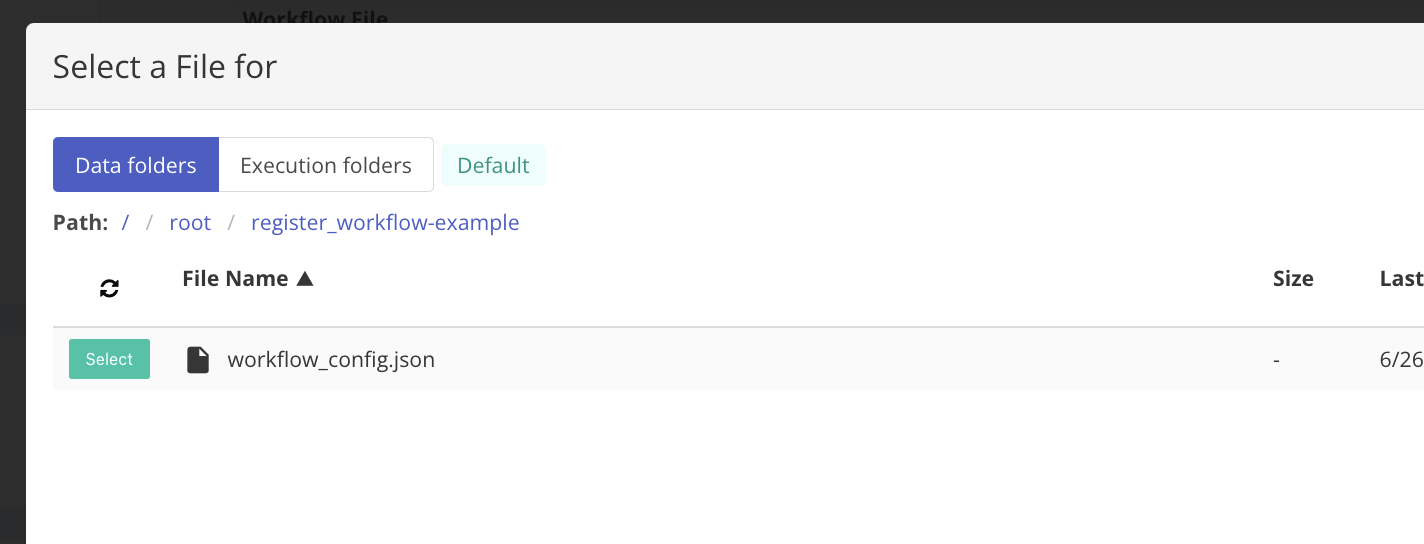
Click on “Select” to open the file browser & select the workflow config file (workflow.json) from your local system.
 .
. -
Upload the file by clicking on the “Add workflow” button.
Useful Tip If you want to easily copy and modify a workflow, you can utilize the Save as new Workflow button in the “Edit Workflow” page. This will save a separate workflow. It’s recommended to change the workflow name before clicking Save as new Workflow.
Running a Workflow
To run a workflow using NeuroWrap, follow these steps:
- Click on the “Run” tab located under the workflow section in the navigation bar.
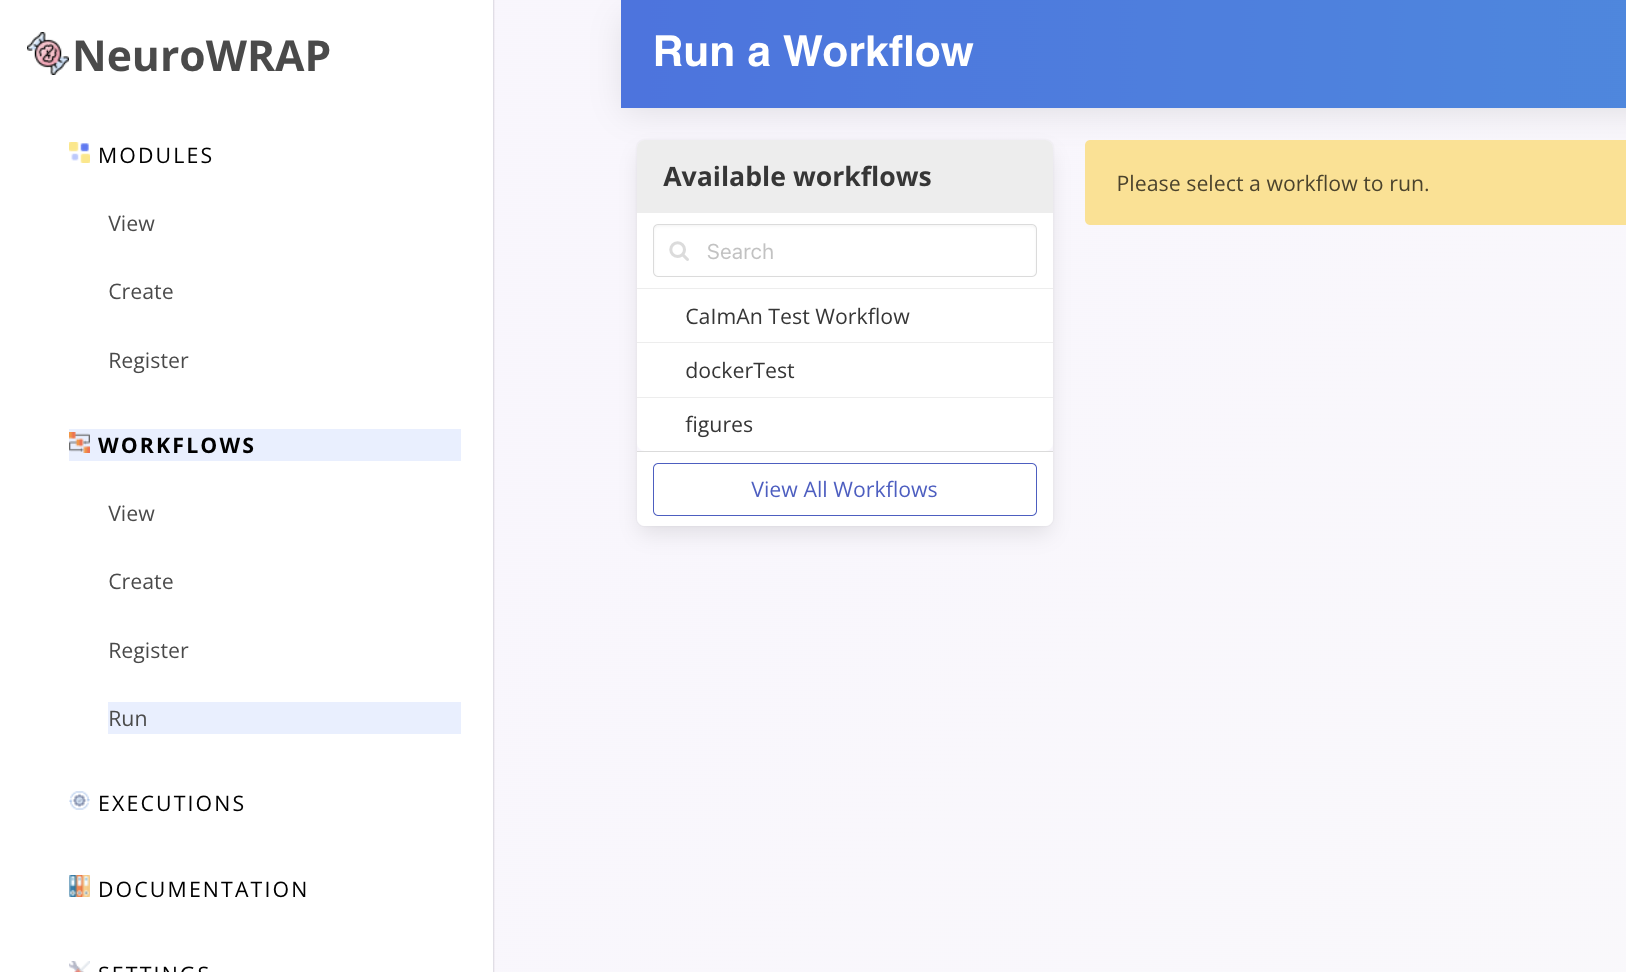
- On the screen, you’ll see a list of available workflows recognized by NeuroWrap. Choose a workflow by clicking on it
- Once selected, the workflow execution screen will appear where you can configure your workflow.
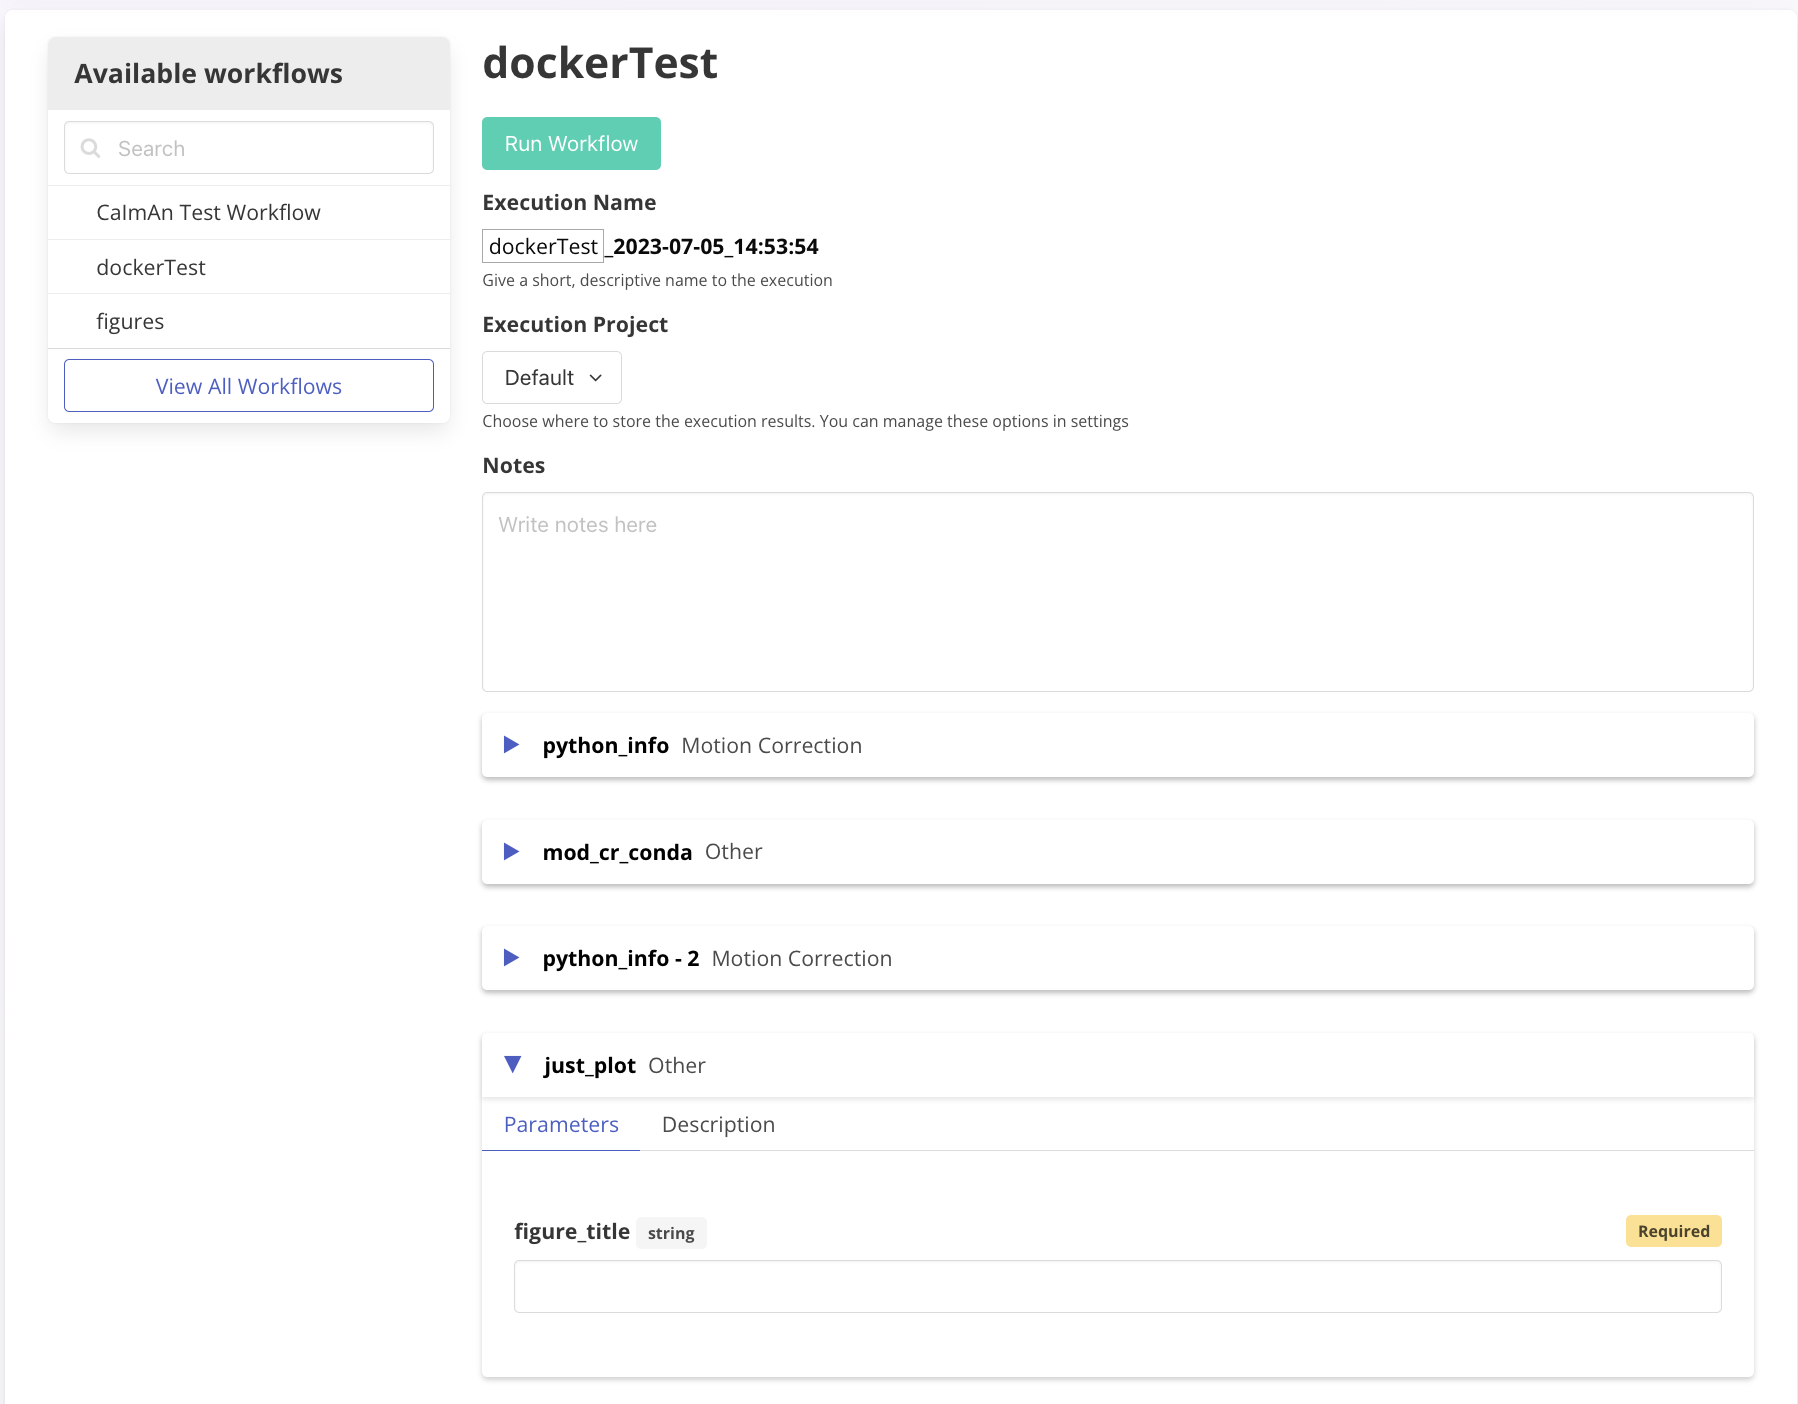
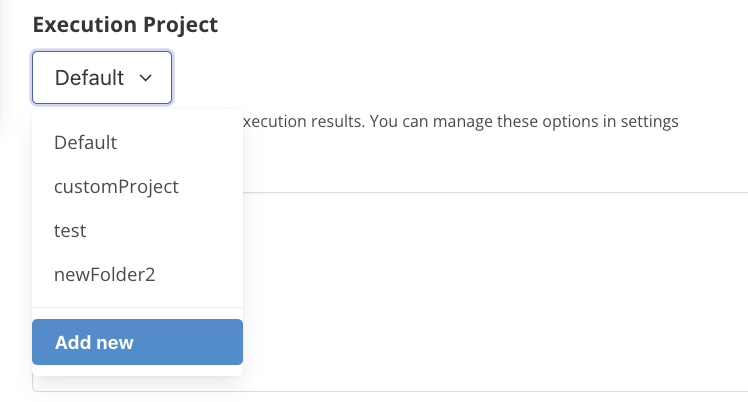
- Select the appropriate Execution project where you want this execution to reside. By default all the executions reside under a directory called “Default” that is managed by NeuroWrap. Refer to the Execution projects section for more details.
- Fill in any required runtime fields. (see “Create Workflows”)
- Once you are finished configuring your workflow, click on the “Run Workflow” button.
NeuroWrap will then take you to the execution screen specific to that workflow, where you can observe the execution progress and view the generated results in real time.